
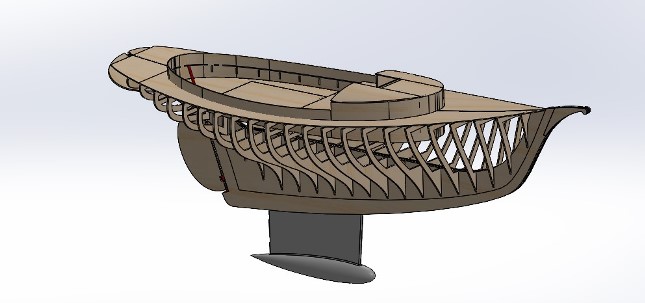
This is the frame set for a typical 31-foot Friendship Sloop. The specific Friendship Sloop design comes from the area around little two of Friendship, Maine, in the Northeast of the US. Fishermen in the area collectively created the designs between the 1800s and the 1900s. They range in size from about 29 feet overall to about 40 feet on deck.
This particular model represents a Friendship sloop with an overall length of a little over 31 feet. The model comes with laser-cut parts for the hull, the cabins, and the deck. Planking materials, metal bits, dowels, keel, and cloth for the sails are not included.
An instruction booklet for the assembly of the frames is available.
Actual boat:
§ LOA: 31’§ LWL: 24’ 9”
§ Beam: 9’ 3”
§ Draft: 5’ 5”
Scale model dimensions, at 1:8 scale:
§ LOA: 46.75”
§
LWL: 35.625”
§
Beam: 13.75”
§
Draft: 12.75” (with recommended external ballast)
Model design criteria:
The model is designed to ease construction. Using multiple frames, and many bulkheads and supports means a builder has plenty of material to work with in case they want to make modifications to the design, based on their methods, complementary parts, or interests.
o Four keels of 1/8” each This gives the total width of the keel at ½”.
o 3/16th offset for hull planking
o Bulkheads are 1/8” birch plywood.
o Well-detailed deck structures
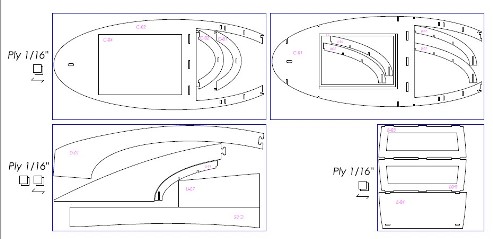
The Laser-cut Parts
The picture below shows all the parts you get with the frame set. Note that each little rectangle is a 24″ x 12″ Baltic birch plywood board.
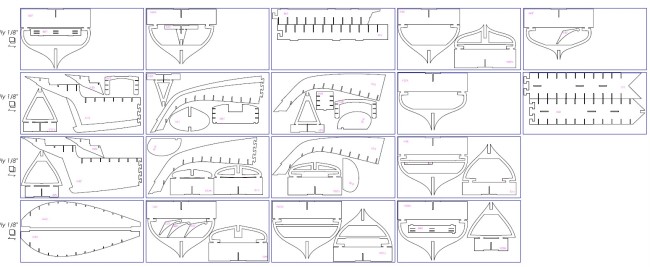
| The main parts are made in 1/8″ plywood but some of the smaller parts, and all the parts that need to be curved, are made in 1/16″ plywood. |
Some Instructional Pictures
| Let’s dig in and have a look at what a builder could expect when they start this amazing model. First, it is useful to know there is plenty of material in the kit. This kit was designed to be a builder’s model, a model that one could modify and work with according to their skills, interests, and equipment. |
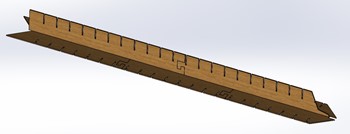
The T-rail should be installed solidly onto a flat surface. Good preparation will result in easier planking.
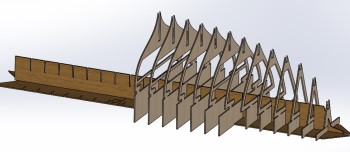
Frames are all numbered and it should be quite clear which way they go on the T-rail. It is recommended that the mast position is double-checked and the relevant frame prepared to receive the mast.
Once the frames are in place, the keel needs to be installed. It is important to check whether it would be better to glue the parts of the keel together before installation into the frames or after.
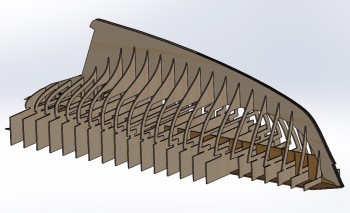
Once the planking is done, the boat can be cut from the build board, turned over, and the tops of the frames can be cut away.
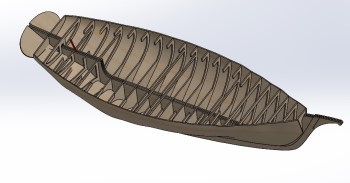
The lower deck is designed to be a simple surface that fits over any ballast a builder might want to add. It can also be used as a surface for servos or battery terminals. The cockpit floor is designed to take the large hatch in the cockpit and should be installed before the curved coamings are installed. We use 1/16″ plywood for the curved parts but it may be advantageous to use these as a template for multiple layers of thinner material. It may be easier to make the coamings that way. It would be useful to plan and install the external ballast at this point.
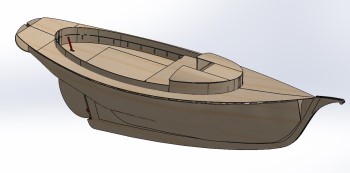
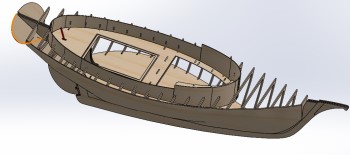
Finally, the boat should look something like this! Now, it’s time to add the rigging, the detailing, and some colour!
Once we have some pictures of the first build, we will upload them to this page. In the meantime, of course, buying a kit from Modeller’s Workshop means you have our attention and we will help you finish the model with whatever help we can give you.
Thanks for the interest!
- Sku
- MW233 - Amy Payson
- Description
- Amy Payson Frame set
- Product Options
# Option Price Sales Tax 1 Price $425.00 Band 1 - Shipping
- Shipping Rate: A